How to run your coding agent in Terminal, with Lumi
Terminal starts the coding agent you already use, in the folder you choose, and gives it a window of its own called Lumi. Here is how to start, switch, move and resume agent sessions.

On this page
Terminal, the Stacklumen desktop app for Mac, does not bring an AI of its own. It starts the coding agent you already use, in the folder you choose, and gives it a window called Lumi to work in. This guide walks through the Agents panel and Lumi, step by step, as the docs describe them.
What you need first
- Terminal on a Mac. Download it from /ide while signed in to your Stacklumen account. There are builds for Apple silicon and Intel Macs, signed and notarised, for macOS 13 Ventura or later.
- The agent you want, installed and signed in. Terminal looks for agents on your PATH. It finds Claude Code, Codex, Gemini CLI, Cursor Agent, Copilot CLI, opencode, Amp, Aider and Goose.
- A folder to work in. In Code (
⌘8), press Open folder… (⌘O) and choose one. A folder inside a git checkout opens the whole checkout. Git needsgiton your PATH; any folder opens without it.
Start an agent
- Open the Agents panel with
⌥⌘B, or Agents in the title bar. Terminal remembers whether it was open. - Under Start in, choose the folder. It follows what you are working on until you pick one. With none, the agent starts in your home folder.
- Press an agent. It opens in Lumi, typed into a real login shell, and its chat shows under Running a moment later.
- Agents you have not installed are listed under More agents, each linking to its install page. Install one, then press Look again.
You can also type start in the command palette, or press Agents in a Code folder's tab to open the panel ready to start one there.
Work in Lumi
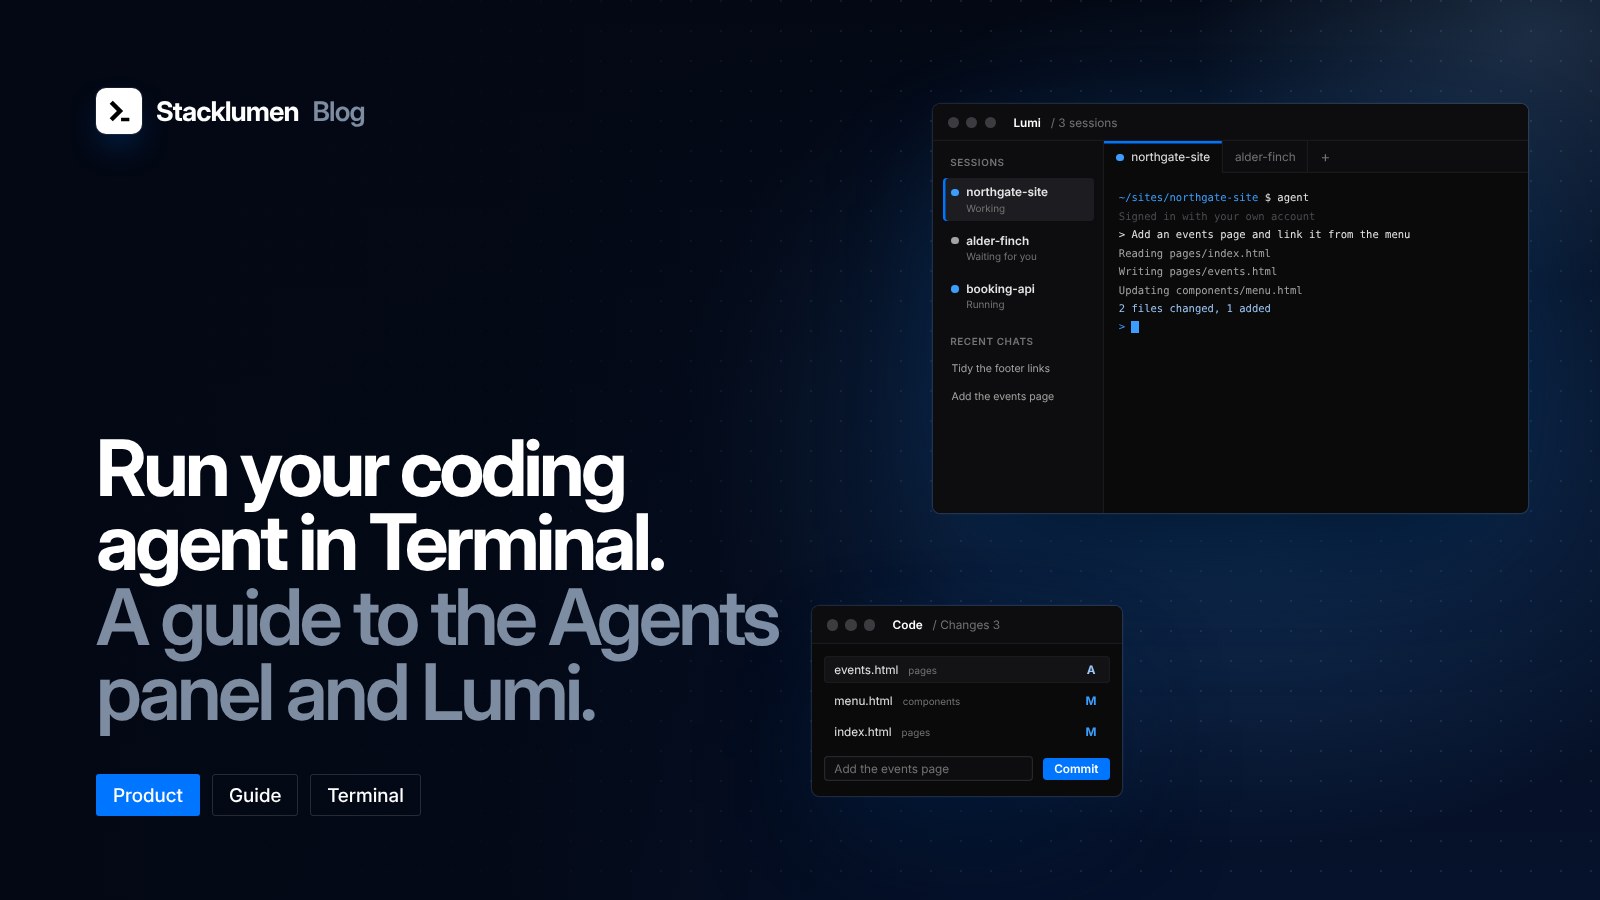
Lumi is a tab of its own, opened with ⌘0 or the last key on the rail. The sidebar folds away so the agent has room.
- Sessions, down the left, lists the agents running in Lumi, with their folder and what each is doing: Working or Waiting for you for Claude Code, Running for the others.
- The same sessions are tabs across the top. The one you choose runs full size beneath. A tab's ×, or a middle-click, closes it.
- + at the end of the tabs, or Start an agent at the top of the list, shows the folder and every agent installed, one press each.
⌥⌘←and⌥⌘→step through the sessions from anywhere in Lumi. With two or more open, the palette has Next session in Lumi and Previous session in Lumi.- The Lumi key on the rail counts the sessions open in it.
Lumi names the window, not the agents. Each agent keeps its own name and mark, and runs signed in with your own account.
Move a session to the panel and back
For the session showing, Move to the panel sends its terminal to the bottom panel with the agent still running. Move to Lumi in the panel's head brings it back. The shell and the agent carry on, scrollback and all. A plain shell, opened with ⌃ and the backquote key, always stays in the panel.
Pick up earlier chats
- Recent chats, in the Agents panel and in Lumi, lists the latest chats for This folder or All. Choose one to read it in a tab: what was asked, what the agent said and the tools it used, following the agent while it runs. Claude Code and Codex chats show here.
- Resume in terminal picks a chat up again in a new terminal, in the folder it started in. Claude Code, Codex and Cursor Agent can resume.
- In Lumi, Open the chat opens the chat of the session showing, once its agent has written one.
Watch the changes land
Back in Code, the file tree follows the disk, so files appear and go as an agent changes them. Changed files carry a letter: M modified, A added, D deleted, R renamed, U untracked, ! in conflict. A diff follows its file as it changes, so you can watch each edit arrive.
If a file changes on disk while you have unsaved edits, the editor says so and offers Take the disk's version or Keep mine. When you are happy, write a message and commit with ⌘↵, then Push. Terminal never discards, resets or force-pushes anything. Do those yourself in a terminal.
Connect the agent to Stacklumen
In a Code folder or a Cloud checkout, you add Stacklumen's MCP server to your agent yourself. Workspace owners and admins find it under Developer → Agents & MCP (⌘7): the server's address with Copy URL, a client configuration to copy, the agents connected and their live calls.
What Terminal does not do
Terminal never talks to an AI model and holds no AI key. It starts your agent by its command name, from a fixed list, and reads the chats the agent keeps on your computer without changing them. Your agent's sign-in, plan, settings and MCP servers stay your own, and when it exits you are back at your own prompt.